
Owning a Ford vehicle comes with the responsibility of keeping it in top condition. While many maintenance tasks require professional expertise, there are several tasks you can perform at home to keep your vehicle running smoothly. Performing regular maintenance not only helps extend the lifespan of your Ford, but it can also save you time and money on minor repairs.
In this blog post, we’ll highlight some simple DIY maintenance tasks that you can do at home. These tasks will help you stay ahead of common issues and keep your Ford in excellent shape between visits to Beach Ford.
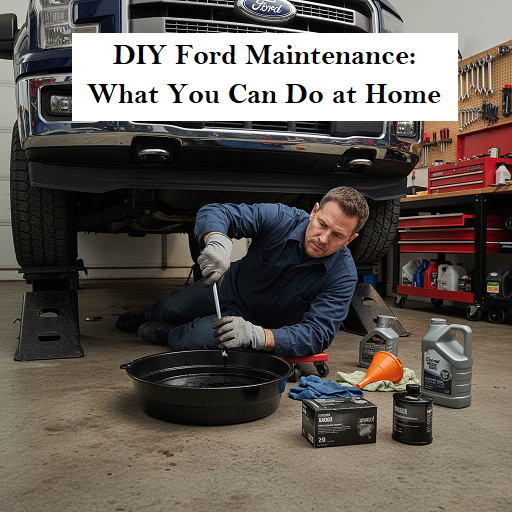
1. Checking and Replacing Engine Oil
Regular oil changes are crucial for the health of your engine. While your Ford’s owner’s manual will tell you how often to change your oil, it’s also a good idea to keep an eye on your oil level and quality.
How to Check Your Oil:
- Park your Ford on a level surface and let the engine cool for a few minutes.
- Open the hood and locate the oil dipstick.
- Pull the dipstick out, wipe it clean with a rag, and then reinsert it fully.
- Pull it out again and check the oil level. If it’s low, top it up with the appropriate oil for your model.
How to Change Your Oil:
- Raise the vehicle using a jack and secure it with jack stands.
- Drain the old oil into a pan by removing the oil drain plug.
- Replace the oil filter and drain plug, then fill your engine with the recommended amount of fresh oil.
- Check the oil level again using the dipstick to ensure it’s correct.
Changing your own oil can be a bit messy, but it’s a relatively simple task that can save you money on service.
2. Replacing Air Filters
A clean air filter helps your engine breathe better and can improve fuel efficiency. Ford recommends replacing your air filter every 12,000 to 15,000 miles, but it’s a good idea to check it more frequently, especially if you drive in dusty conditions.
How to Replace Your Air Filter:
- Locate the air filter box (it’s usually a large, rectangular box near the engine).
- Open the box by unlatching or removing screws.
- Remove the old air filter and inspect it for dirt and debris.
- Insert the new air filter, ensuring it fits snugly in place.
- Close the air filter box and secure it.
Replacing your air filter is a quick and inexpensive way to keep your engine running efficiently.
3. Checking Tire Pressure and Tread
Maintaining proper tire pressure and checking your tire tread are important steps in ensuring your vehicle’s safety and fuel efficiency. Tires that are either overinflated or underinflated can cause uneven wear and poor handling.
How to Check Tire Pressure:
- Use a tire pressure gauge to check the pressure of each tire (including the spare).
- Refer to the manufacturer’s recommended tire pressure (usually found on the driver’s side door jamb or in your owner’s manual).
- Add or release air as needed using a tire pump or air compressor.
How to Check Tire Tread:
- Insert a penny into the tire tread with Lincoln’s head facing down.
- If you can see the top of Lincoln’s head, it’s time to replace your tires.
- Check the tread wear across all four tires and ensure there’s no uneven wear (which could indicate alignment issues).
Checking tire pressure and tread regularly can improve your vehicle’s fuel economy and safety.
4. Replacing Wiper Blades
Worn-out wiper blades can reduce visibility, especially during heavy rain. It’s a good idea to replace them every 6 to 12 months, or as soon as you notice streaks or squeaks while using them.
How to Replace Wiper Blades:
- Lift the wiper arm away from the windshield.
- Press the small tab on the wiper blade to release it from the arm.
- Slide the old wiper blade off and attach the new one by sliding it into place.
- Gently lower the wiper arm back to the windshield.
This is one of the easiest and most effective DIY tasks you can do to ensure your safety while driving.
5. Checking and Replacing the Cabin Air Filter
The cabin air filter helps keep the air inside your vehicle clean by filtering out dust, dirt, and pollen. Over time, the filter can become clogged, reducing airflow and causing unpleasant odors.
How to Replace the Cabin Air Filter:
- Locate the cabin air filter compartment (usually under the glove box or behind the dashboard).
- Open the compartment and remove the old filter.
- Insert the new filter, ensuring it’s oriented correctly.
- Close the compartment.
Replacing the cabin air filter is a quick and inexpensive way to improve air quality inside your Ford.
6. Changing Spark Plugs
Spark plugs are essential for engine performance. Over time, spark plugs can wear out or become dirty, leading to poor engine performance and reduced fuel efficiency. Most Ford models require spark plug replacement every 30,000 to 100,000 miles, depending on the type of spark plugs used.
How to Replace Spark Plugs:
- Locate the spark plugs (they’re usually under the engine cover).
- Use a spark plug socket and ratchet to remove the old spark plugs.
- Check the new spark plugs to ensure they’re gapped correctly (using a feeler gauge).
- Install the new spark plugs and tighten them securely.
- Reinstall the engine cover and check the performance.
Replacing spark plugs can help improve engine efficiency and prevent rough idling or misfires.
7. Checking and Replacing the Battery
Your car battery is the heart of your electrical system, providing the power needed to start the engine and run electrical components. A weak or old battery can lead to starting issues and electrical failures.
How to Check the Battery:
- Inspect the battery terminals for corrosion. If corrosion is present, clean it with a mixture of baking soda and water.
- Check the battery’s charge using a multimeter. A fully charged battery should read around 12.6 volts.
- If the battery is more than 3 to 5 years old or showing signs of weakness, it may be time for a replacement.
How to Replace the Battery:
- Disconnect the negative (-) terminal first, followed by the positive (+) terminal.
- Remove any brackets securing the battery and take it out of the vehicle.
- Install the new battery, reconnecting the positive (+) terminal first, followed by the negative (-) terminal.
- Secure the battery with the bracket and test the vehicle’s electrical system.
DIY Maintenance: When to Visit Beach Ford
While these DIY tasks are simple and effective, some maintenance and repairs are best left to the professionals. If you’re unsure about any of the tasks or run into issues, the experts at Beach Ford are always here to help. We offer a wide range of services, from oil changes and brake repairs to more complex diagnostics and repairs.
Save Money
Performing basic DIY maintenance on your Ford can save you money, help you stay on top of important tasks, and ensure your vehicle runs smoothly for years to come. Whether you’re checking the oil, replacing the air filter, or swapping out wiper blades, these simple tasks are great ways to take care of your car.
If you ever need assistance or if you’re unsure about any DIY maintenance tasks, don’t hesitate to reach out to our team at Beach Ford. We’re always happy to help you keep your Ford in great shape!
Beach Ford
Your Trusted Ford Experts in Myrtle Beach
Let us know if you need help with any maintenance or would like to schedule a service appointment!
Connect with us


- June 2026
- May 2026
- April 2026
- March 2026
- February 2026
- January 2026
- December 2025
- November 2025
- October 2025
- September 2025
- August 2025
- July 2025
- June 2025
- May 2025
- April 2025
- March 2025
- February 2025
- January 2025
- December 2024
- November 2024
- October 2024
- September 2024
- August 2024
- July 2024
- June 2024
- May 2024
- April 2024
Archives
- Accessories
- Air Conditioning
- Brakes
- Business Solutions
- Cleaning Tips
- Co-Pilot360
- Comparisons
- Connectivity
- Driving Safety
- Driving Tips
- EcoBoost Technology
- Electric Vehicles
- Environment
- Family Fun
- Financing
- Fleet Service
- Ford Performance
- Ford Pro
- Ford Racing
- Ford SUVs
- Ford Vehicles
- Fuel Efficiency
- General Information
- Helpful Hints
- History
- Hybrid Vehicles
- Insurance
- Local Information
- Maintenance & Service
- New Drivers
- New Ford Trucks
- New Vehicles
- Parts & Parts Department
- Powerstroke Diesel Engines
- Pre-Owned Vehicles
- Radio
- Road Trips & Vacations
- Safety Tips
- Seasonal
- Service Tips
- Shopping
- SYNC System
- Technology
- The Future of Ford
- Tires
- Towing
- Uncategorized
- Vehicle Buying Process
- Vehicle Details
- Warranties